Using SMB Imaging
Be default, Theopenem deploys images via Http and uploads images via udpcast ports 9000-10000. This has a few benefits:
- No need for an SMB share
- The ability to deploy an image anywhere in the world.
- Multiple com servers can be used to split the imaging load
There are times when you might want to deploy / upload your images directly to an SMB server:
- Imaging may not work properly for some models over Http
- Imaging is faster over smb
- You want to use the FFU imaging format, which requires SMB
- Significantly less CPU usage during imaging
The downside to using SMB imaging, is that each computer must be able to directly access the SMB share. This typically isn't a problem if you are imaging from a central location anyway. This will limit your imaging abilities to only work within your network.
Note
If you are already using multiple com servers, which requires an SMB share, then you can skip to Step 3 Enable SMB Imaging of this guide, otherwise continue along to configure an SMB share.
1. Setup the SMB Share
The easiest way to setup a share is to use your existing toems local storage directory and that's what this guide will focus on. If you want to setup a share on different file server that is fine also, just be sure your computers can reach that server.
- Create a user that will be used to connect to the share. It can be a local user on Theopenem server or a domain account. This guide is using a local user named toems_smb_user
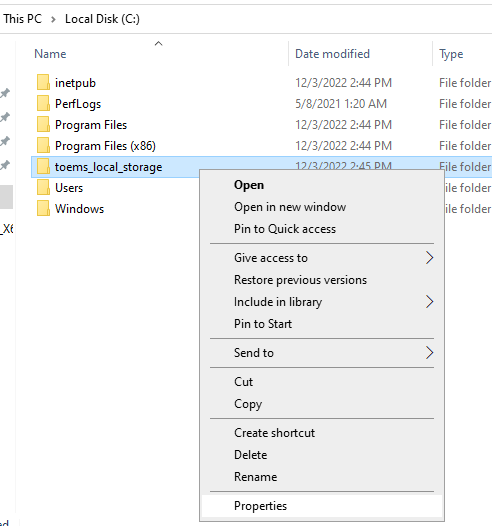
- In Windows Explorer navigate to c:\ and locate c:\toems_local_storage (unless you changed the default location during intall)
- Right click on the folder and select properties
- Select the Sharing tab then Advanced Sharing
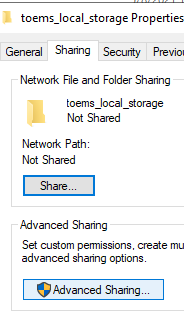
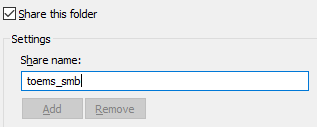
- Check the Share this folder box and give it a name such as toems_smb
- Select Permissions
- Remove the Everyone user and add your user from step 1 with Full Control
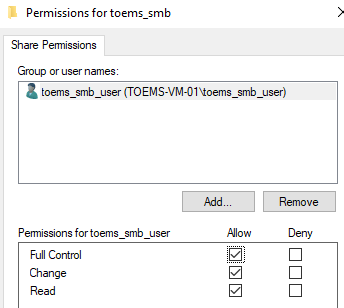
- Select OK
- Select the Security Tab and select Edit
- Add your user from step 1 with Modify Permissions
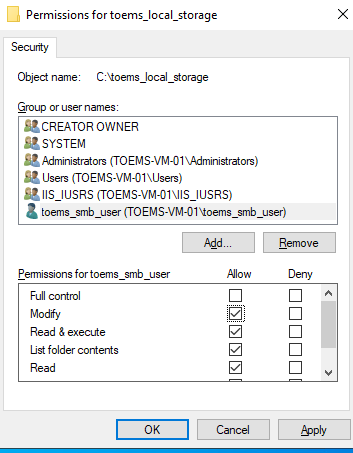
- Click Ok then Close
2. Enable SMB Storage Location
- Login to the Toems-UI
- Select Admin Settings->Storage Location
- Change the Storage Type to SMB
- Change the Storage Path to the UNC path of the share using either the FQDN or IP Address,
such as\\TOEMS-VM-01.theopenem.com\toems_smbor\\192.168.56.1\toems_smb - Enter the username for the user that will connect to the share (do not include the domain)
- Enter the password for the user that will connect to the share
- If the user is a domain user, enter the Domain in FQDN format
- Select Actions then Update Storage Settings
- Select Dashboard from the navigation menu. You should now see a Remote Storage listed. If it is not listed, something is not configured correctly.
Tip
If you setup an smb share that was not at the same location as the toems local storage, you need to replicate everything to the share. This can be done by navigating to Admin Settings->Task Scheduler and clicking Run Now on Storage Sync
3. Enable SMB Imaging
- Login to the Toems-UI
- Select Admin Settings->Imaging Client
- Enable Upload / Deploy Direct to SMB
- Select Actions then Update Server Settings
You are now ready to upload and deploy images just as did before except now the transfer will happen over SMB instead of Http.