Toec Image Prep
Toec Image Prep is a simple utility than can be run before you are ready to upload your image. It makes it easy to perform a few tasks such as populating setupcomplete.cmd and using a Sysprep answer file. It is optional, but is recommended to learn it as it helps ensure a smooth image upload.
How To Use:
- Install Toec on your image
- Ensure that it finishes the provision process
- Open Windows explorer and navigate to C:\Program Files\Toec
- Right click on Toec-Imageprep and select Run As Administrator
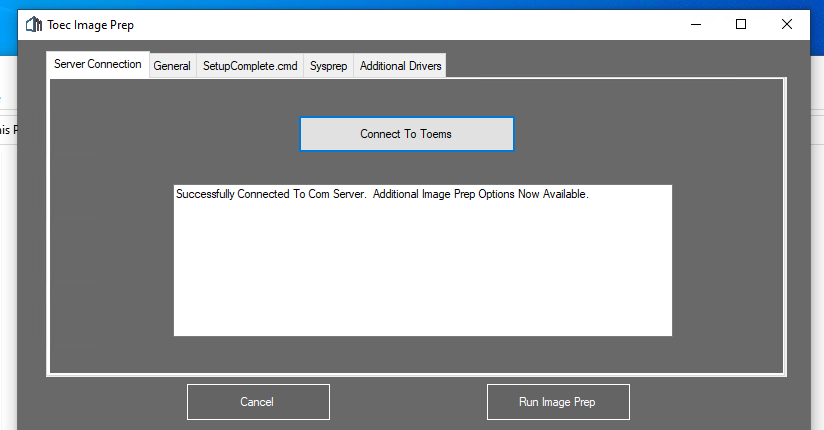
- Click Connect To Toems
- Each tab provides additional options to apply to your image.
- When ready, click Run Image Prep
- If Run Sysprep was selected, the computer will automatically shutdown when complete
- You are now ready to upload
Server Connection Tab
This tab is used to connect the Toec client to the Toems server to provide some additional Image Prep options. You must make sure that Toec has finished provisioning before you select Connect, or it will throw an error.
General Tab
- Disable Hibernation - This disables hibernation on the image. Hibernation can cause issues when trying to upload an image.
- Enable WinLogon Finalizing Background - If you are using the Toems First Run imaging workflow, this will display a background to your users letting them know the computer is still finalizing and not yet ready for use. It will automatically be removed when it's ready. You should disable this option if you are not using the First Run imaging workflow.
- Create SetupComplete.cmd - This will create a setupcomplete.cmd file that will automatically run as the last step of the sysprep process before user logon screen is displayed. The script's contents can be provided in SetupComplete.cmd tab.
- Run Sysprep - If selected, Sysprep will automatically run as the last step of your Image Prep, an answer file must be supplied in the Sysprep tab
- Reset Toec - This should always be checked. Since Toec is installed on the image, it must be reset or else it will not function properly when the image is deployed. This is because Toec uses an installation Id for each install that must be unique.
- Uninstall Remote Access Client - Similar to Toec, the remote access client must be removed from the image or it will not function properly. The remote access client may not be installed on your image, but if it is, it will be removed.
SetupComplete.cmd Tab
This tab allows you to easily populate the setupcomplete.cmd script from a template saved in Theopenem. If you are not familiar with SetupComplete.cmd, it is a built-in functionality of Windows. It is the final script to run after Windows is installed but before the logon screen appears. It makes it easy to run a few extra commands after image deployment before the logon screen. You can make a predefined template in Toems under Admin Settings->Image Prep Templates->Create SetupComplete File. Then you can easily select the contents for the file from Server Templates dropdown list. Here is an example of a template that can be used for setupcomplete.cmd:
mkdir "%ProgramFiles%\Toec"
net stop toec /y >> "%ProgramFiles%\Toec\setupcomplete.log"
powercfg.exe /h off >> "%ProgramFiles%\Toec\setupcomplete.log"
copy NUL "%ProgramFiles%\Toec\setupcompletecmd_complete" >> "%ProgramFiles%\Toec\setupcomplete.log"
del /Q /F c:\windows\system32\sysprep\unattend.xml >> "%ProgramFiles%\Toec\setupcomplete.log"
del /Q /F c:\windows\panther\unattend.xml >> "%ProgramFiles%\Toec\setupcomplete.log"

REM ####### Driver install ###########
PowerShell ^
$Drivers = Get-ChildItem "C:\drivers" -Recurse -Filter "*.inf" ;^
ForEach($Driver in $Drivers) {;^
$args = \"/add-driver $($Driver.FullName) /install \";^
$p = (Start-Process -FilePath pnputil.exe -ArgumentList $args -NoNewWindow -Passthru);^
Wait-Process -Id $p.Id -Timeout 10 >> "%ProgramFiles%\Toec\setupcomplete.log";^
};^
%End PowerShell%

net start toec /y
wmic USERACCOUNT WHERE "Name='localadmin'" set PasswordExpires=FALSE
Sysprep Tab
The Sysprep tab allows you to provide your sysprep answer file, either from a Toems template, or from a local file. A template can be created in Toems under Admin Settings->Image Prep Templates->Create Sysprep Answer File Here is an example of an answer file that you can use. It should only serve as a starting point for you, some values need updated for your environment:
<?xml version="1.0" encoding="utf-8"?>
<unattend xmlns="urn:schemas-microsoft-com:unattend">
    <settings pass="specialize">
        <component name="Microsoft-Windows-Shell-Setup" processorArchitecture="amd64" publicKeyToken="31bf3856ad364e35" language="neutral" versionScope="nonSxS" xmlns:wcm="http://schemas.microsoft.com/WMIConfig/2002/State" xmlns:xsi="http://www.w3.org/2001/XMLSchema-instance">
            <ComputerName>*</ComputerName>
            <CopyProfile>false</CopyProfile>
            <RegisteredOrganization>Theopenem</RegisteredOrganization>
            <TimeZone>Eastern Standard Time</TimeZone>
            <RegisteredOwner>Theopenem</RegisteredOwner>
        </component>
    </settings>
    <settings pass="oobeSystem">
        <component name="Microsoft-Windows-International-Core" processorArchitecture="amd64" publicKeyToken="31bf3856ad364e35" language="neutral" versionScope="nonSxS" xmlns:wcm="http://schemas.microsoft.com/WMIConfig/2002/State" xmlns:xsi="http://www.w3.org/2001/XMLSchema-instance">
            <InputLocale>en-US</InputLocale>
            <SystemLocale>en-US</SystemLocale>
            <UILanguage>en-US</UILanguage>
            <UserLocale>en-US</UserLocale>
        </component>
        <component name="Microsoft-Windows-Shell-Setup" processorArchitecture="amd64" publicKeyToken="31bf3856ad364e35" language="neutral" versionScope="nonSxS" xmlns:wcm="http://schemas.microsoft.com/WMIConfig/2002/State" xmlns:xsi="http://www.w3.org/2001/XMLSchema-instance">
            <OOBE>
                <HideEULAPage>true</HideEULAPage>
                <HideOEMRegistrationScreen>true</HideOEMRegistrationScreen>
                <HideOnlineAccountScreens>true</HideOnlineAccountScreens>
                <HideWirelessSetupInOOBE>true</HideWirelessSetupInOOBE>
                <ProtectYourPC>1</ProtectYourPC>
            </OOBE>
			 <UserAccounts>
                <LocalAccounts>
                    <LocalAccount wcm:action="add">
                        <Password>
                            <Value>Password.1</Value>
                            <PlainText>true</PlainText>
                        </Password>
                        <Description>Local Admin Account</Description>
                        <DisplayName>localadmin</DisplayName>
                        <Group>Administrators</Group>
                        <Name>localadmin</Name>
                    </LocalAccount>
                </LocalAccounts>
            </UserAccounts>
        </component>
    </settings>
</unattend>
Additional Drivers
This tab makes it easy to add additional drivers to your image. All of your FileCopy modules will show up here. This typically is not needed for most users, as drivers will be deployed specific to your model when deploying the image.