Build the Windows Imaging Environment
The WinPE imaging environment is not distributed with Theopenem due to licensing reasons. You will need to build it yourself.
Theopenem provides 2 options to build the environment:
Option 1: Build From the Web UI
As of Theopenem 1.5.4, the WIE can be built directly from the Toems UI. It requires some setup work but will make things easier in the future if you take the time to complete it.
On your Theopenem server, begin by installing the Windows ADK. On that page click the link that says Download the Windows ADK for Windows 11, version xxxx
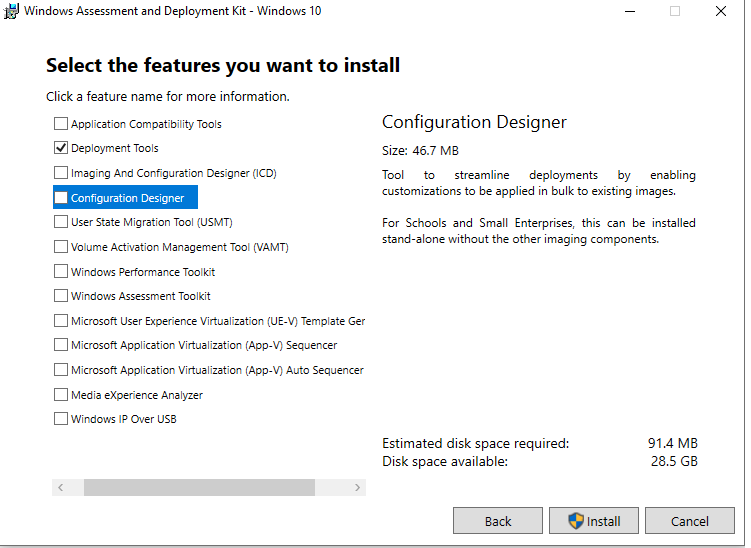
During installation, select all default options until you reach the Features Page. On the features page select Deployment Tools, uncheck everything else.
Once again navigate to the Windows ADK. This time click the link that says Download the Windows PE add-on for the Windows ADK, version xxxx
Install the Windows PE add-on will all the default options
Note
The next few steps will create a local administrator on your Toems Server. This user is required to build the WIE as the Application Pool in IIS that Theopenem runs under, does not have enough permissions to mount a wim. If you are not comfortable with this, proceed to using the Standalone tool to build the environment
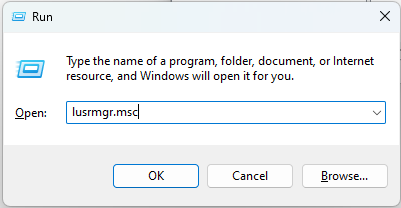
Open the Local Users and Groups Manager from the Windows Run command lusrmgr.msc
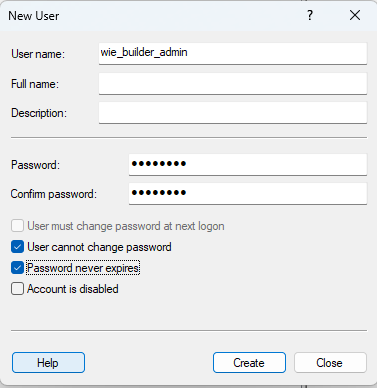
Right click on Users and select New User
Fill in a username(something like wie_builder_admin is nice and descriptive).
Create a password for the user, you will need to enter this password in the Toems WebUI also, don't forget it.
Uncheck User must change password at next login
Check User cannot change password
Check Password never expires
Click Create, Then Close
Find your newly created user in the list, right click and select properties

Click the Member Of tab
Click Add
Type administrators in the box and select OK
Click OK and close the Local Users and Groups Management tool
Login to the Toems UI
Select Admin Settings->Impersonation Accounts
Create a new account providing the username and password you created back in steps 7-8.
Select Admin Settings->PXE / Boot Menu->WIE Generator
Change the Run As drop down to the impersonation account you created in step 20
Change the Time Zone / Input Locale: / Language if needed
Place a checkbox in the com server that thiis environment will communicate with by default
Select Actions then Generate WIE
The Active Build Processes should populate while the environment is building. This process may take up to 10 minutes to complete. You can navigate away from this page while it is running.
The Build Date will populate once the build has completed
Select Actions then Download ISO to download the environment.
Warning
If you plan on PXE booting this environment. You will need to copy the tftpboot folder located at
C:\Program Files\Theopenem\Toems-API\private\wie_builder\Builds\tftpboot
and merge it with Theopenem Tftp folder located at
c:\program files\theopenem\tftpboot
You must copy the tftpboot folder to every com server that will provide PXE support.
Finally, Change your PXE Mode in Admin Settings->PXE / Boot Menu->PXE Settings to the appropriate WinPE architecture. WinPE also works with the Toems Proxy DHCP to support both Legacy BIOS and EFI PXE booting simultaneously.
Option 2: Build From A Standalone tool
Use this option if you are having problems with building the environment from the UI, or would rather use the standalone tool to build it on any computer.
On your Theopenem server, begin by installing the Windows ADK. On that page click the link that says Download the Windows ADK for Windows 11, version xxxx
During installation, select all default options until you reach the Features Page. On the features page select Deployment Tools, uncheck everything else.
Once again navigate to the Windows ADK. This time click the link that says Download the Windows PE add-on for the Windows ADK, version xxxx
Install the Windows PE add-on will all the default options
Download and extract the WIE Builder 2.0.3 from Theopenem downloads
Login to the Toems-UI and select Admin Settings->Client Com Servers. Copy the URL for the com server this WIE will connect to.
In the package that was unzipped, right click on Manual-ToemsPE-Build.cmd and select edit
Paste in the com server URL where it says ComServerURL=. Overwriting the http://0.0.0.0/ with your com server url.
Save and close the file.
Right click on Manual-ToemsPE-Build.cmd and select Run as Administrator
After the the script is done(It may take up to 10 minutes), look in the builds directory for the output.
If you are PXE booting, merge the tftp folder with your Theopenem Tftp Folder located at c:\program files\theopenem\tftpboot. You must do this on every com server. Change your PXE Mode in Admin Settings->PXE / Boot Menu->PXE Settings to the appropriate WinPE architecture. WinPE also works with the Toems Proxy DHCP to support both Legacy BIOS and EFI PXE booting simultaneously.